After many comments on our headboard, I thought I’d show how we did it..
Our headboard was probably my favorite project, and now my favorite item in our whole house. I’ve had the idea for a while, but it was just a matter of executing it. At Lowes and Home Depot, you can buy big sheets of wood in all different thicknesses and materials. I had told Brady I wanted to just paint one of those and hang it above our bed like a headboard, but he thought it was going to look weird, so we practiced and did a chalkboard out of one first. It worked so well and was SO cheap (somewhere around $10-$15 for the wood, depending on which one you get). When we re-did our dressers, I knew I wanted the headboard, and I knew Chevron was the choice. (after bouncing around a few different ideas.. the possibilities are endless!)
So, we went to pick up our wood, and lucky for me there was one that was already white! So that would cut half of our painting out. (I originally just planned on painting it all white then going back through and doing the chevron stripes in grey.) As far as which wood to choose, I have no idea about the technical side, but I just chose one that was thick enough to now bow out when it got on the wall, but thin enough that it wasn’t super heavy. We had pre-measured our bed so we had them cut it just exactly that size, which they do for free! We got our wood, our paint, some Frog Tape and rollers and checked out for under $30.
So, we went to pick up our wood, and lucky for me there was one that was already white! So that would cut half of our painting out. (I originally just planned on painting it all white then going back through and doing the chevron stripes in grey.) As far as which wood to choose, I have no idea about the technical side, but I just chose one that was thick enough to now bow out when it got on the wall, but thin enough that it wasn’t super heavy. We had pre-measured our bed so we had them cut it just exactly that size, which they do for free! We got our wood, our paint, some Frog Tape and rollers and checked out for under $30.
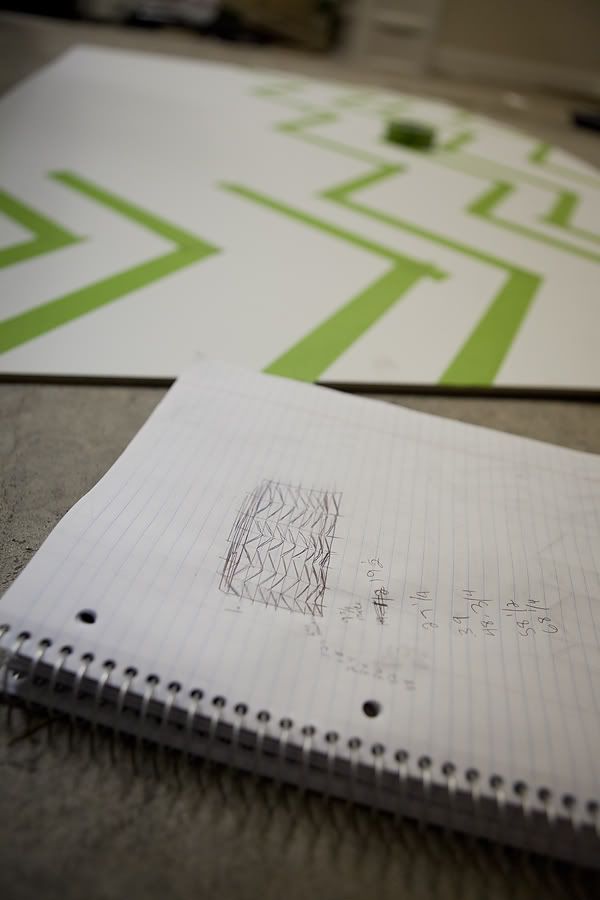
Then the tricky part began.. I didn’t realize how complicated it would be to paint some zig-zags across a board. After doing a little internet research, and being warned everywhere that this was no beginners design, we went ahead and braved it. I’m so glad I have Mr. Miller, the genius, to help me with this kind of stuff because I probably would have given up after about 5 minutes and done plain ol’ stripes. (which would look fab as well, I think) but the Mr. was determined and so we made a few rough drafts on paper and then made our marks and started taping.
If you’re going to brave the Chevon, here is how to do it… put it on paper before you mark up your board, it’s way easier to visualize.
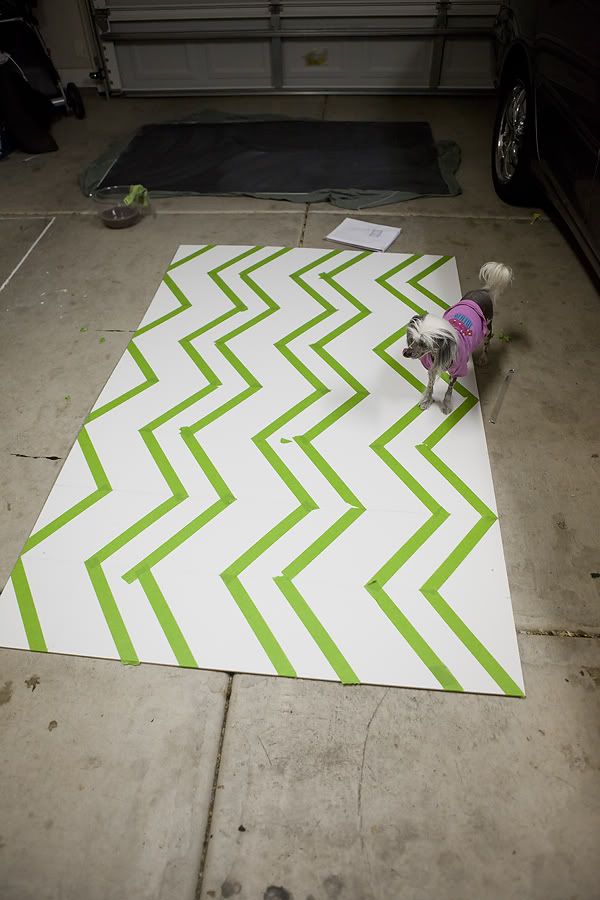
Then, we just taped it off and started painting.

Of course we had Itty for moral support!

When it was all finished, we secured it to the wall with 4 screws. Easy Peasy.
And TA-DA! Totally made the room.
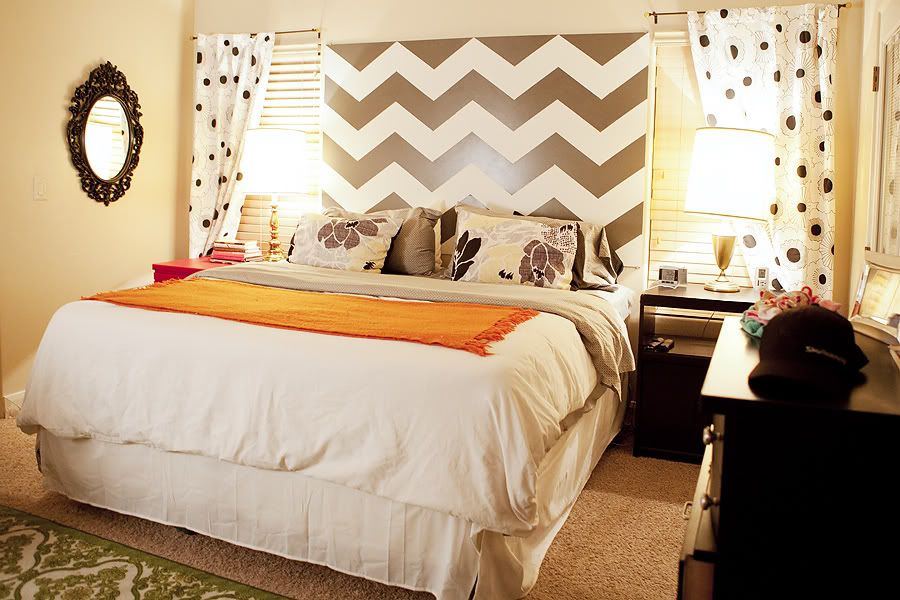
And here is how we decorated our entire bedroom for a bargain..
DIY Chevron headboard, about $25
Dressers – free.. paint and brush cost- $11, new hardware, $15 total = $26
Black mirror- yard sale $3, shiny black spray paint $2 total = $5
White duvet cover (not totally necessary) found on sale at Target with two pillow shams – $13
Green rug, found on clearance in the outdoor section of Walmart – $20.
Night stands, old red dresser and TV stand that was given to us a few years ago that we had lying around for a while – FREE
Lamps – D.I, 2 for $2.
Curtain – again on sale at Target- $9 for the pair.
Lamps – D.I, 2 for $2.
Curtain – again on sale at Target- $9 for the pair.
All added up, equals EXACTLY $100.
(but didn’t seem like even that much at the time because it was all done in $10-$20 purchases here and there)
We LOVE our new room. The master bedroom is the easiest room to ignore because no one really sees it.. it drops the end of the priority list, but DON’T LET IT. I can’t tell you how magical it is to have our own little slice of heaven in the house… And one that we dreamed up from start to finish. (I was so proud that I DIDN’T get the idea off Pinterest! lol) It was such a fun project to do together and every single day we see how our work paid off.
Our entire room, completely decorated for $100.. Not bad, eh? 😉
If any of you try this, or any variation of this, make sure to share it with me! I’d love to see it.
Get creative! Check out this cool fabric headboard at allthingsthrifty.com
sophie
What is the width of your zig zags?
Shio W.
You bedroom is a dream!! I love it!! I am working on a headboard too for our bed and cannot wait!! Great job Cass!!
Cass Miller
Thanks love! You’ll have to post about yours! I can’t wait to see. 🙂