Okay, THANK YOU for all the love on my kitchen reveal post. It was such a labor of love and feels so good to have it finished and have so many nice remarks on it. We love this space and I’m so glad you guys do too!
One thing I mentioned in the post is that we did it on a BUDGET.
When we walked through our house, it was obvious the kitchen needed to be renovated (no dishwasher, what??) And the sellers told us they would re-do it for 3k more on the asking price. I knew I wanted my own vision for the mspace, so we put our offer in as-is, with a 5k cash-back in our terms. They accepted (probably relieved they didn’t have to renovate the kitchen in 30 days).
We moved in the end of March (two days shy of delivering Grae) and were scheduled to start renovating the first week in May… but that date turned into the first week in August. Apparently everyone bought a house or built a house when we did in our town and contractors were SCARCE. It was by far, the most frustrating part of our remodel (dealing with contractors and delays). In the mean-time though, through all the waiting, I was able to tweak the plan and find new materials and ideas that really ended up paying off in the long-run.
So.. the A-Z of kitchen remodeling decisions.. on a budget.
1. Cabinets:
I knew I wanted white shaker-style cabinets. Mostly because our house was built in 1950 and that is a really classic look. It was a big deal for me to pay tribute to the character and era of our home, so I tried to stick with really classic looks and add personality where I could. Obviously, my first idea was Ikea Adel cabinets. They were going to be perfect for our space, so we got on the ikea plan site and rough-drafted up our kitchen. We figured it would be about $4500 without the island. That was doable. THEN, we came across a local cabinet guy that said he would match Ikea’s price for us and build us custom cabinets “and not that pre-fab crap”, he said. DONE. What ended up being a major bonus, is that because he had made us wait so long to start, he threw in our beloved island. So basically, we totally scored for our cabinets. The moral of my story though is to shop around, because you never know when a custom cabinet guy is going to agree to match ikea’s price, then drop the ball and throw in an even better deal. 😉 (After all is said and done, we are THRILLED with our cabinets. They are honestly so beautiful!)
The best part of our cabinet guy is that he just really saw my vision. We walked through our kitchen and I told him exactly where I wanted everything, he brain stormed with me and we had a great creative connection. I was able to customize everything and that was invaluable in the end.
A few specifics on our cabinets is that I wanted as many deep drawers as I could. I’m short, so I like to keep things lower (I have to jump onto the counter to get things from the top shelf). I decided to do all drawers in my lower dining room portion, leaving a space for a desk. In my island I also did all drawers. The only lower cupboard space I have is under my sink. It was an unusual decision and one I hadn’t seen before, but I knew I liked big deep drawers, so “load them on me” I said. I can now tell you that I am super happy with that decision. My drawers are so big and store so much. I could realistically put my whole family in my lower cabinet drawers if I wanted to. 😉
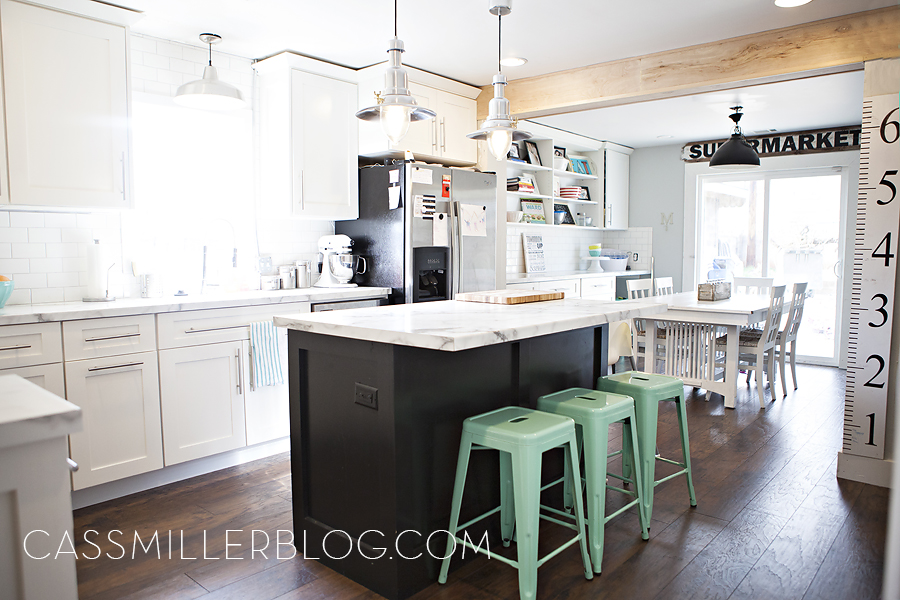
I also decided to do a black island in contrast to my white cabinets. I knew my kids would be sitting up to the bar and I worried about constantly wiping feet marks off the white. I do like the way it looks, but in hind sight, the black is actually way more high maintenance than the white. It doesn’t show feet prints, which is a plus, but it shows finger prints on the sides and on the drawers and dust shows up way more so I am wiping down my black 5x as much as my white. I think a contrasting color was a good idea, but I sort of wish now I would have gone with something like grey or better yet, a bold color of mint or aqua or green? All would have been good ideas. In the end, I love the look of the black and it doesn’t bother me all that much. Plus, I love how the black draws so much attention to my fabulous barstools (also in 30 inch if you have a higher bar). So… okay black, you can stay.
We also chose the bar-style hardware from Ikea. I really considered doing cup-pulls and knobs, but decided to go a little more sleek and modern. We got our hardware at Ikea for SO MUCH cheaper than anywhere else who carried the same exact handles. These were $7.99 a 2/pack. We had seen them for as much as $13 a piece. I chose the 13″ size and am so glad I did. A lot of people wondered if they would be too long, but I love how dramatic they look. Especially on my gorgeous bank of drawers in the dining room. We Also bought a pack of the extra long 33″ ones for the barn door. We hung one in front of the sink on that little piece of cabinet that covers the sink and solves no other purpose. It fit perfectly and now I hang my dish towel and gloves there.
2. Counter tops:
To say I lost many nights of sleep over this decision would be an understatement. I went into this knowing I didn’t really care about granite. It’s just not particularly my style and I don’t HAVE to have it, so I was open to other options. We looked at Quartz and was quoted $5k for anything we liked. I also did find some granite that would work.. but I didn’t particularly LOVE, and it too was between $4k-$5k. We planned on spending more than our initial $5,000 cash-back for our kitchen, but that would have drained our budget. We would have been cabinets, counters and done – and without budget for an island. I would have done that if I really felt pulled to a certain option, but I really wasn’t finding anything I died over.
So we kept looking. I was into the idea of Corian for sure. I had seen it, it’s beautiful and I loved the idea of a seamless sink. So we found a solid surface place in town, and went to look at Corian. The first thing I saw when I walked in was this beautiful white counter top with grey veining. EXACTLY what I was looking for. I could have literally screamed I was so thrilled. To my complete and utter surprise? It was formica. You know, formica, that stuff everyone warns you against and complains about from the 70’s because it’s awful and ugly and no one should even dare put it into a kitchen anymore? Yeah, that formica.
So I was like “Um…. what? Formica?” and they were like “Um… yeah. Formica. It’s actually so awesome now days and has a million or so color options.” So I was like “I think I should probably think about this for a while.” and they were like “Oh, and did we mention it’s 1/5th the price of grantie or quartz?” and I was like “Um….. what?!” Yep. Our kitchen quoted for $1200. If you need me to do the math for you, that is $3,800 LESS than what quartz or granite would have been. We still looked at Corian, which would have been about $3,500 for our kitchen and came with limited color options – all of which we weren’t stoked about. So I was like “But I loved the idea of a seamless sink.” and they were like “Oh, I’m sorry, did we not tell you that you can have a seamless corian sink WITH THE FORMICA?” After I came-to from fainting of good news, I was ready to seal the deal. I was doing the Calacatta Marble formica, which was a given, it was the only thing that had my heart leaping from my chest. But what was SO cool is that I had about 9 different options for the edge. Gone are the days of that basic formica edge. They have a ton of options now which included our beloved Marabella edge (examples of some edges here) The Marabella edge was a barely rounded squared off option that didn’t show the laminate seam. Installed, they look amazing. I get more people asking me about my counters than anything else and no one can believe they’re laminate, even and especially in person.
So, counters were set and that freed up just about $4k of the budget we had set aside for counters. Can I get a HALLELUJA? Amen, sister.
3. Lighting:
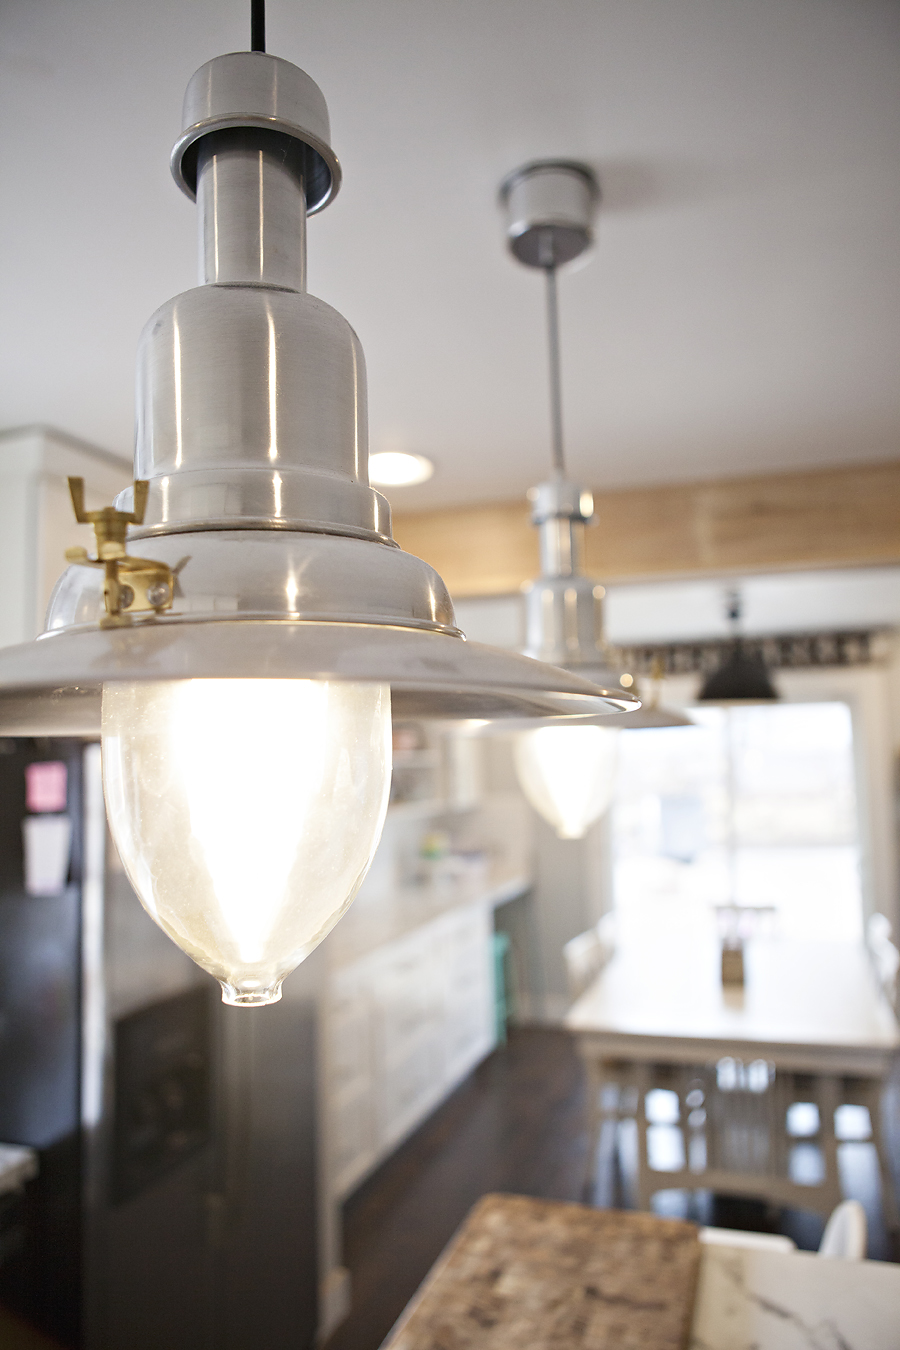
I knew I wanted pendant lights everywhere I could have them. Pendant lights are like jewelry to a kitchen, and the Good Lord knows I love myself some jewelry. I looked them up and planned on about $100/pendant and settled myself on 4. One above the table, one above the sink and 2 above our kitchen island. So, $400 was set aside for lighting.
Then, one date for our anniversary we were strolling through my favorite vintage store (urban renewal for all you locals) and I stumbled upon a black, vintage barn lamp. And I mean, a barn lamp that was actually used inside a barn at one point in it’s life. That is exactly the kind of history I can appreciate and knew it would be perfect for above the kitchen table where I would gather my family for meals. Price tag? $35. After I quit screaming, I checked out happily and our anniversary date was complete. WIN. I had saved myself $65 on my lighting budget.
Then, the next month on our summer Ikea trip, I decided to check out their lighting. The collection online was less than impressive, so I still had my heart set on lighting elsewhere. I wanted something like this or this, and was pretty much not going to settle. And then…. I got to the lighting section and saw staring at me, in all their glory with light shining down on them (or maybe that was light shining down from them..) these awesome, industrial, barn-like, I-don’t-even-know, stainless pendants. Holy mother, I thought they were so cool. I looked at Brady, but he was so busy staring into these awesome pendants he couldn’t even return the glance. “I think I love those.” He said. And just then and there, I knew I had picked the perfect life-mate. My good luck probably gets obnoxious at this point, because these suckers were $29.99. I mean….!!! (If you don’t live near an Ikea, you can get them on amazon here.) We added this light above the sink and voila! Lighting was done. SO, for the barn lamp, the ikea pendants and above our sink, we were at a whopping $145 for our lights ($255 less than budgeted). We decided to add canned or recessed lighting, which we were fortunate to be able to trade-out with my husband’s business. (You see the theme here? Use any connection you can!) The canned lights added SO much light to our kitchen. It shines like the top of the Chrystler building when it’s dark out. 😉
4. Floors:
So what did we do with all this extra money we had saved? We decided to put floors in. Floors were always something we wanted to do, but had decided to live with the cheap tile that was there and do the floors later when we had the money. But when our budget freed right up, we decided now was the time. I’m so glad we did, too. It made a huge difference and it was a lot easier to get the floor down when we had it all gutted than it would have to go back and do it later.
We weren’t exactly sure on what floors to do, but when I saw this picture on pinterest, I was sold on a dark, rich wood. We were certain hard-wood was out of the budget, so we started looking at an alternative. One day strolling through home depot, we ran across this floor. It was exactly the color I wanted… and it was .99 a square foot. That was doable. I got online to check the reviews… great reviews. Done and done, son. (RIGHT after we got done with our kitchen, they added this color option in our same flooring which is so beautiful if you were looking for a lighter color.) So, .99/sq foot, plus the pad to put underneath for better sound control at .40/sq foot, we were just under $400 for our entire kitchen flooring. And it took our kitchen from “nice” to “wow” in one day, flat.
5. Details:
The details were a big part of making our kitchen “ours”. Without our barstools, our faux beam, our added bits of personality, our kitchen would look like any other white, stock kitchen you could buy from a box store. Because this is our first home we’ve owned, and the sky was the limit on what we could do to personalize the space, I tried not to overlook any detail. With the white-on white-on white counters/cabinets/backsplash, I knew without a doubt our kitchen needed color. The contrasting black island helped, but it still looked a little too uniform. I wanted it to have an eclectic, lived in, almost farm-house feel. Here is a break-down of our details and how they have made the space 100% OURS.
- Mint barstools : Adding a bold punch of color is just something I don’t shy away from, and I don’t think you should either. If I get sick of this color next year (which, have you seen them? I wont.) I can always spray paint them something else because they’re metal. It added so much personality to the kitchen. More so than a classic neutral or stainless would have like these.. even though these are super cute. I’m glad I didn’t play it safe. These stools come in lots of colors, too. I was coveting red or yellow for options too!
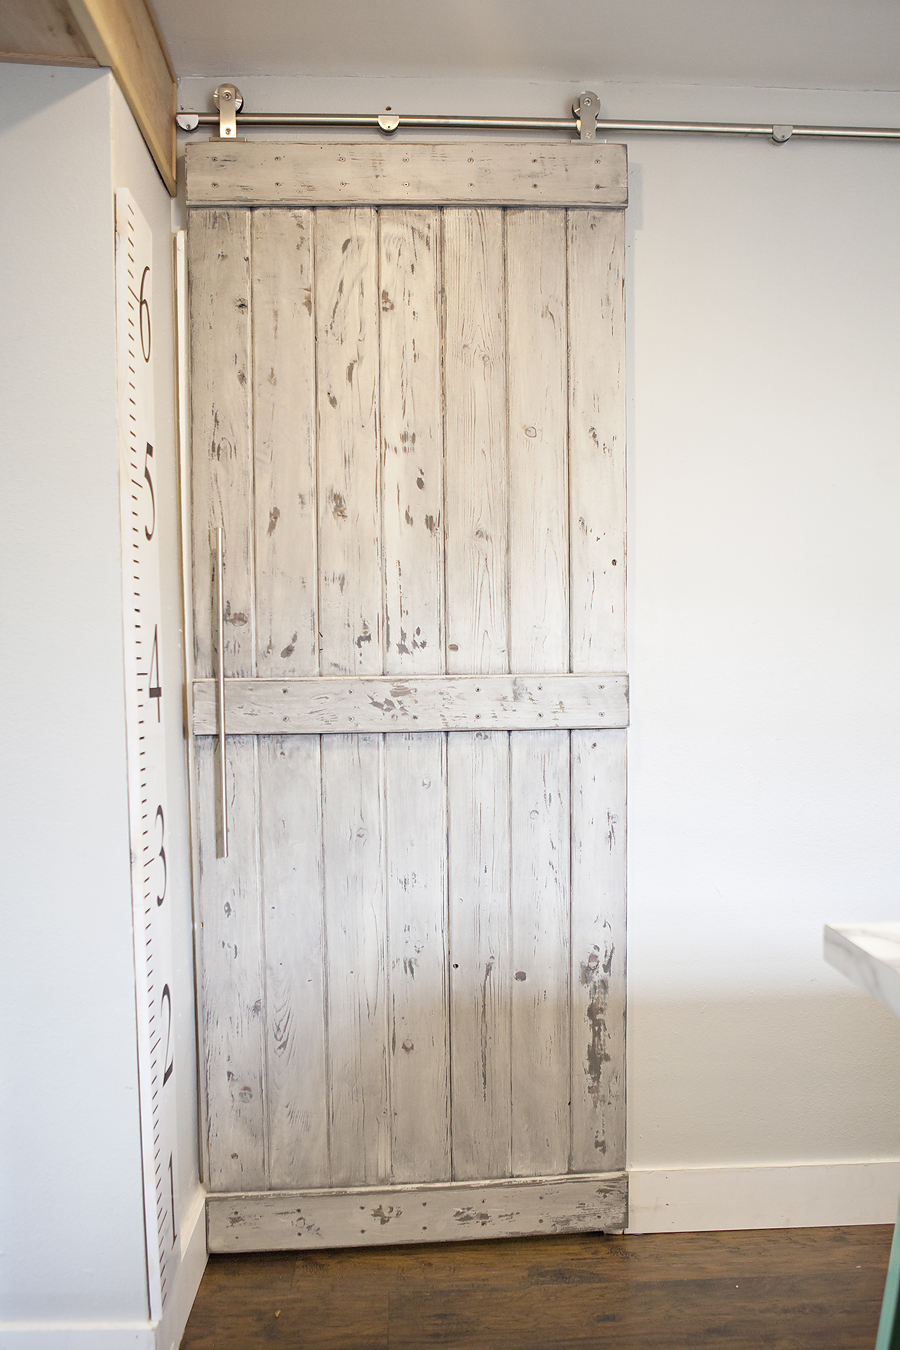
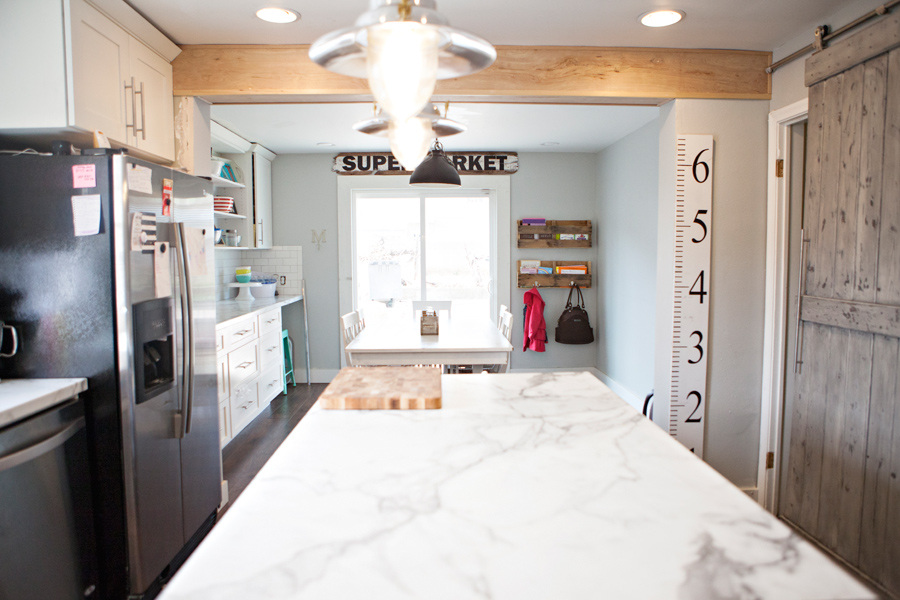
- Sliding barn door : This door was the perfect alternative for us. Before, we had a regular open-swing door that opened right into the walkway from the kitchen to dining room. A slider made our kitchen feel a lot bigger without that door cutting the space in half, plus it added an opportunity to put something unique in our space. We chose this hardware with rubber wheels so it didn’t sound like metal on metal every time we went into the laundry room. This door just glides perfectly and is quiet as a mouse. The door itself, was made by my step-dad who is a wicked handyman and can make-up anything I can sketch or show a picture. I searched a lot of barn door inspiration like here and here on pinterest and we came up with this perfect style. My mom and I painted it white first, sanded that to distress it, and went over it with a grey wood stain. We added a handle to match the hardware of our kitchen. It’s probably the most complimented item in our kitchen and people cannot believe we did it ourselves (with lots of help!).
- Faux Exposed Beam: I love the look of exposed beams. I mean, nothing is more cottage-y than that, right? I didn’t have an exposed beam, but I had a wall casing in here that wasn’t doing me any favors. I asked if I could wrap it in wood to make it look like an exposed beam. My step dad said “I don’t see why not.” I loved that answer while remodeling. We wrapped it in sheets of pine and trimmed out the edges to finish off the look. It is one of my favorite things about the kitchen. It packs so much personality into one area.
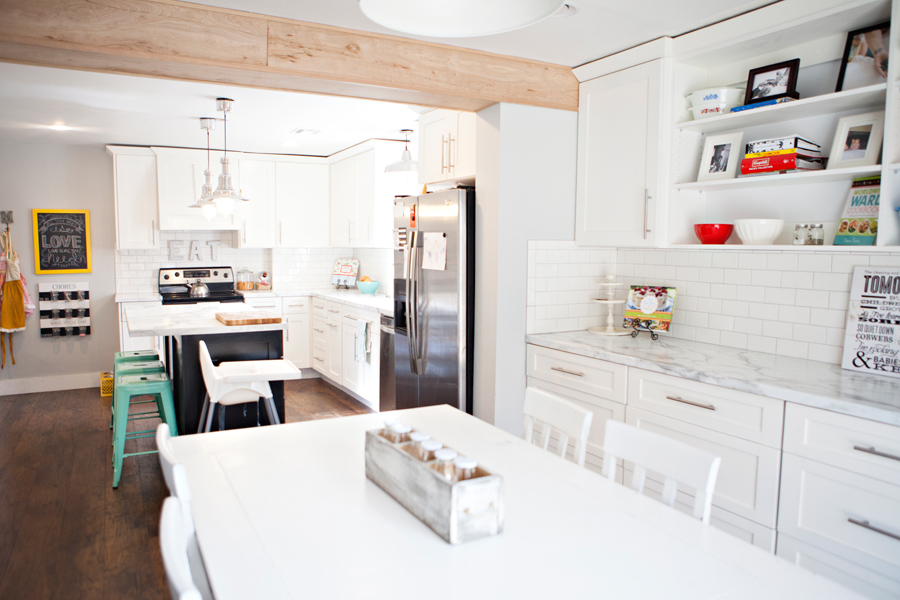
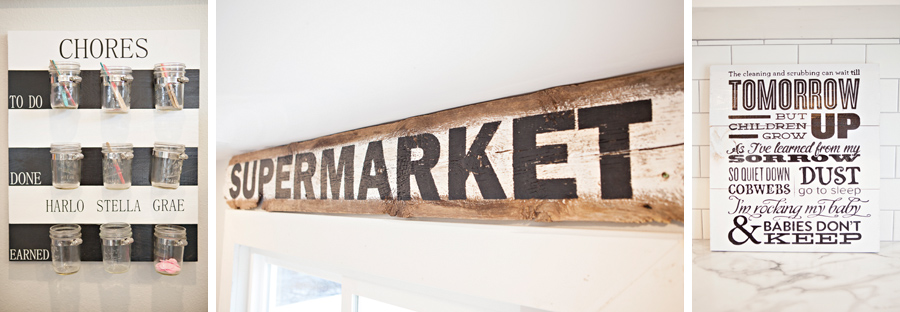
- Personalized wooden goods: Because my kitchen was so white and bright and painted, adding natural elements was imperative to that organic, warm, cottage-y feeling I wanted. My sister-in-law is the genius behind The Organic Home and has really helped me incorporate personalized touches to my home. My wooden ruler to document my growing girls, my supermarket sign, the girl’s chore chart, and my Babies Don’t Keep poem (which was my favorite Christmas gift from Brady this year) are all from her shop. Adding these touches to the kitchen really made a big difference in the cozy-factor. I also love that so many pieces in here have a sweet story behind them.
 Accessories: Now that we had this beautiful space, how were we going to use this beautiful space? We had tons of storage and I wanted every last appliance to have a home. I unpacked all my kitchen, and my favorite dishes and jars found homes in plain site. I loved the open shelving in the dining area to show some of my favorite cook books, dishes and pictures of our family in the kitchen. It’s been a fun place to style.Brady and the girls got me the anthro mixing bowls set last year (can’t find a link but they look just like my favorite latte bowls) for Mother’s Day and I either keep them on the open shelves so I can quickly grab some down to make cookies in, or I use the perfect size for the amount of fruit or veggies I have that week. They make me happy, and I love seeing them out in plain view.
I always wanted to be the kind of person who had pretzels for the taking on a jar in her kitchen. Growing up, my neighbor Mitzi always had a jar full of pretzels like this on her counter and it just made me feel nice and cozy and at home at her house. Since we lived here, I have kept pretzels (or homemade cookies!) in this jar and my heart swells every time a visitor reaches in for a snack. I have another cookie jar that I inherited when my Grandma died that we keep granola with a scoop in.
My simple stainless canisters hold the stuff we’re getting into all the time. Oatmeal is in the largest, ovaltine is in the center, and almonds or nuts in the smallest. This has been great for the girls to be able to easily help me in the kitchen grabbing their own things for breakfast, etc. They love it
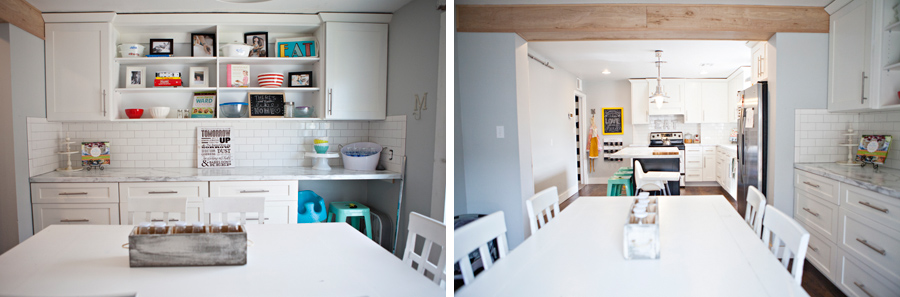
My mom made these awesome pallet shelves for me a few years ago and I have loved using them for different things. In our old house they housed all my cookbooks. In this space, they hold all the kids school books and things that need to be returned, checked, etc. We added hooks to hold a few bags and coats as well. They are treasures to me!
Designing this kitchen myself was definitely one of the most challenging and rewarding projects I’ve ever taken on. Every time I cook in this kitchen, I love it even more. It’s been so fun to see the way having this space finished has changed the way we live in this house. We’re all always in the kitchen, around the island, around the table, crafting, cooking, baking, dancing. It is our little haven.
I know this is a super long post with tons of info, but I wanted it all in one place. If you are remodeling your kitchen, I hope this helps you in any way! It can be daunting, but I promise you it’s worth it. While it has been hard work, it has been such FUN work. I have enjoyed every single step of this process. (Anyone local have a kitchen you need help remodeling?? :D)
And because today is officially FEBRUARY (my birth month!), I am giving away a measuring stick from The Organic Home. To enter this give away, follow @cassmiller and @theorganic home on instagram, and PIN any picture in this post. Leave a comment to let me know you’ve entered!
If you have any more questions, I’ll try to answer each one in the comments!
xoxo
hannahrose
entered!
Hannah
I entered!
Kristal
Entered! Thank you so much for taking the time to share all your secrets with us!!
Anna
Entered! Your kitchen turned out BEAUTIFULLY. Good work!
Cami H.
Entered!! Ps. You now have my DREAM kitchen!!! Love this so much!
lindsay
Entered! Your kitchen is my dream.
Ashley flowers
I want to win
Melissa
I entered!!!
Your kitchen looks great, I literally cannot believed our countertops are Formica! Wow
Sierra Frank
Entered! And Happy early Birthday!
Kenzie
Entered! Yay I love your kitchen
Diane Love
Entered. Love love your kitchen!!
Jessica Griffin
Entered!!! I need to win!!
Leslie
Entered! Now crossing my fingers until Friday. Love the kitchen thanks for all the details can’t wait to start decorating my house!
Megan Giraldo
Entered. Gorgeous kitchen! I absolutely love it!
Ashley
Entered! Have been wanting to get something like this to keep track of my little guy’s growth. 🙂
Summer
Entered! I seriously love how your kitchen turned out! It’s so so beautiful. I love following you and your blog.
Jana
I entered. Absolutely love this space!! Also where did you get your table?
Cass Miller
Hi Jana! It’s originally pottery barn, then painted white. I am actually trying to get rid of it and make my husband make me one to match the barn door. Are you local?? 😀
Jana
Haha I have been looking to make a farm table myself but I love yours! yes I am local. What’s you price range? You can email me at janawardell@msn.com
Alison
One thing I really love about your kitchen is that the style echos the outside of your home – right down to the bright, happy door you painted and the mint stools! I love your space and I’m really inspired by it! I’ve been trying to convince my husband we should paint our cabinets white, get new countertops and get rid of our carpet in our kitchen/family room area and this post may be just what I need to show him that we can do it on a budget! Since we’re local, I am also wondering if you could share the contact info from your cabinet guy – we need to build a computer work station in our kitchen and I think that might be the first place to start.
Alison
p.s. I entered!
Sydney
I am in LOVE with how your kitchen turned out! I think it motivated me to finally order some new bar stools…in yellow or Kelly green. So cute! I entered your contest 🙂
Chelsie
Entered! I am so in love with your kitchen!! Defiently inspiration for when I do mine!! Thanks for sharing!!
marisol
You did an amazing job, Cass!! I entered the contest!
Lauren Wittwer
Entered! I need one of these adorable measuring sticks to keep track of my 3 growing boys! P.S. Love your new kitchen and your blog!
Kadee
Entered! Our daughter just turned 1, now is the time to start tracking. Plus, its so pleasant to look at! Would love to have one in our home.
Tiffany Gray
Your kitchen is stunning. And you are even prettier. Inside & out, mama. Crazy for the chore chart and, of course, love the large measuring stick! Need it for my crew. I have the perfect spot for it. Love & Light, Tiffany Gray aka @thegraygang
Britney
Such beauty here!! I pinned and entered!
Alicia Salazar
Entered!! <3
Katie
Entered!
Amanda Campbell
I seriously love your style and could look at your pictures all day long!! Oh and p.s.Pick me I entered!!!
Kali
Love the work you put into this! I entered the contest as well!
Carly
I remember stumbling along this post so long ago and now that i’m about to remodel my kitchen I came back to you for inspiration! Thanks for adding the different links in this post! I need all the help I can get!
Cass Miller
Oh kitchen remodels are so much work, but so so worth it! Feel free to message me with questions. I know I had a million when I was going through our remodel!
Alison
I am wondering if you have a phone number or link to your cabinet guy? I loved your kitchen when I first saw it more than a year ago and I still love it! The only difference is that now we are actually trying to find a cabinet guy and get started on our own kitchen remodeling adventure. 🙂
Denise Gaudette
Very beautiful. Did you use the gloss of etching finish ?
Elizabeth Mastopietro
What edge did you use on your formica counter?
Cass Miller
I believe we used the Mirabella edge. It was a double rolled, squared edge. 🙂 It was an upgrade, and TOTALLY worth it.